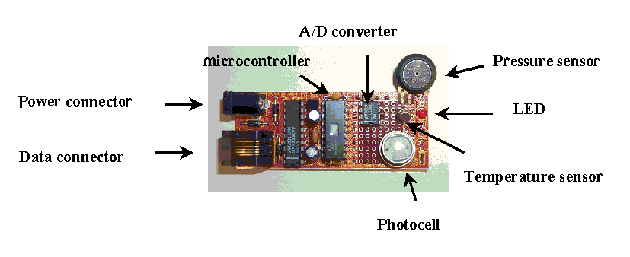

First, install the software. You only need to do this the first time you use your weather probe. From the floppy disk, copy the file JrSummitApp.exe to your hard drive. It doesn't matter where you put this file, but it is easier if you create a separate directory for this project so that your data files will be easy to find. Also, you change the name of this file if you want to use a simpler name that is easier to remember. The other files on the floppy disk are program files that were used to program the small microcontroller on the board. You do not need these files, but they can teach you about what the board is doing.
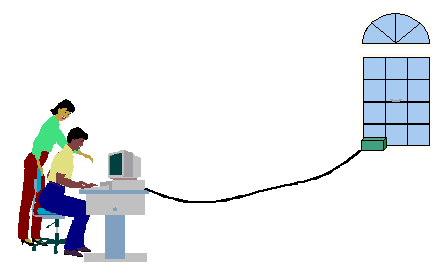
To use the probe, it should be placed by your window on the outside (the window sill) The probe should be kept in the little plastic box so that it will not get very wet or dirty from the weather. (water will not destroy the probe, but it may not work well when it is wet. You should let it dry) If the weather outside is cold, the battery should be kept on the inside of the window.

1) Connect the probe data line to a working serial port on your computer. The serial port is the connector on your computer which has nine pins The outside shape is like a trapezoid.Do not try to connect your probe to your modem.
2) Connect the battery to the probe board.
3) Run the file JrSummitApp.exe In PC Windows, you can do this
by clicking twice on the file from Windows Explorer (not Internet Explorer).
Or you can use the DOS window if you prefer, and type JrSummitApp then
4) After you run that file, a new file will be created which is called weather.dat
This is the file which contains your data. Every time you run the program
Jrsummit.exe, that program will replace the file weather.data with a
new file containing the new data.
5) Next, to send the data to our lab, you will need to use the Internet.
When you connect to the Internet, go to our web page:
http://www.media.mit.edu/~fletcher/probes/upload.html
6) Click on the Browse button to select your data file, weather.dat
7) Click on the Upload button to send the file.
8) After you do this you will see your data displayed on the web page in text.
The data looks like this:
z
Light level = 190
These are typical values for the Boston area inside our lab. The sensor
probe is not calibrated, so some are more accurate than others. The
temperature is in Kelvin (to convert to Celsius, you must subtract 273.16).
The pressure is in KiloPascals (1 millibar = 100 pascals). The light level
is relative. If there is more light, the value will decrease.
9) Our program at MIT will then use your data to update the map display.
10) Don't forget to disconnect the battery when you are finished.
You can also use this board without the Internet connection. To see the
data from the board, you can use any software which can send and receive data from the serial port.
The simplest software to use is called Hyperterm. It is a terminal
program which comes with PC Windows software (check the
Accessories menu on your computer). Instead of connecting using a
modem, you can set the terminal program to connect directly to the
serial port (usually called COM1, for example). The settings for the
serial port should be: bits per second = 9600, data bits = 8,
parity = none, stop bit = 1, flow control = none (or hardware).
Once you open the terminal program and the connection is established
to the board, you can take data by pressing any key. (don't forget to
attach power to the board) You will see the light flash and the screen
will display the data.
A more advanced project is to write your own program which
sends and receives data from the serial port. You can do this using
almost any programming language, such as Visual Basic, C, and now
it is even possible with JAVA. This would allow you to write programs
which use the data from the sensors. To receive data from the board,
you must send a character to the serial port. (this is called polling)
The board will then respond with its data.
If you are interested in learning more about electronics, a more
advanced topic is to learn how to program the microcontroller
chip. The microcontroller supplied with the sensor board cannot
be reprogrammed. However, there are other kinds of
microcontroller available which can be reprogrammed many times.
If you learn about electronics and about programming a
microcontroller, you can build electronic circuits that can do
many things, such as building a robot or a sound toy. If you would
like to learn more about microcontrollers and how to use them,
you can start by looking at the following web page:
http://ttt.media.mit.edu/pia/Research/iRX2/
There is a lot of information on the Internet about this,
so you can search for the topic "PIC microcontroller",
for example. Also, in some countries, you might be able
to find books and magazines on this topic.
If you have any questions or any problems about your
weather probe, you can send an e-mail message to:
fletcher@media.mit.edu
Have fun,
Rich
H000199A0FAD3A0D4190
Temperature (K) = 297.< Pressure (KPa) = 105.6
If you would like to use this sensor board for other
projects without an Internet connection, read here: